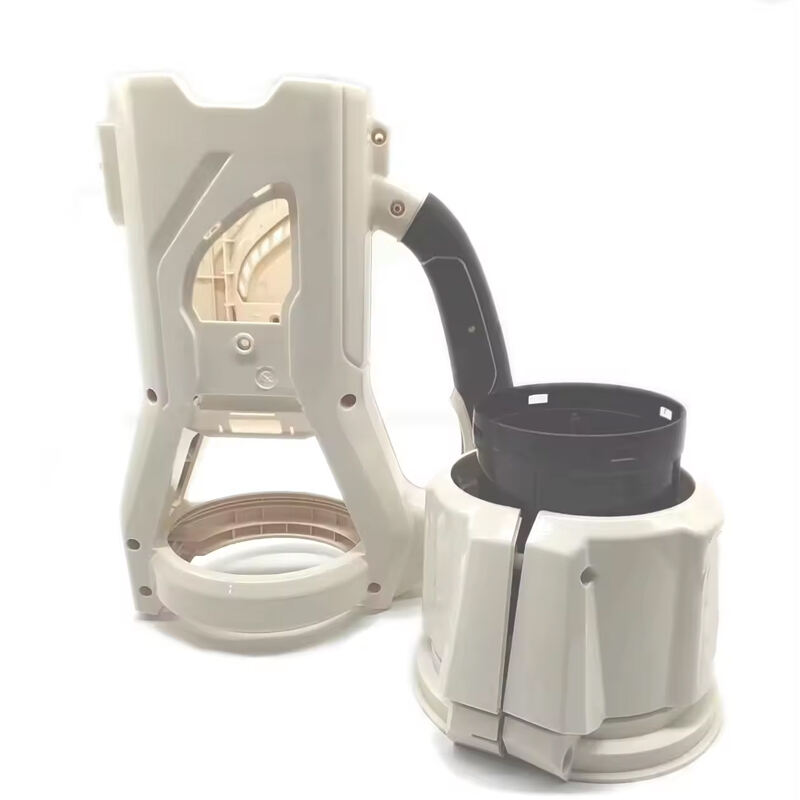
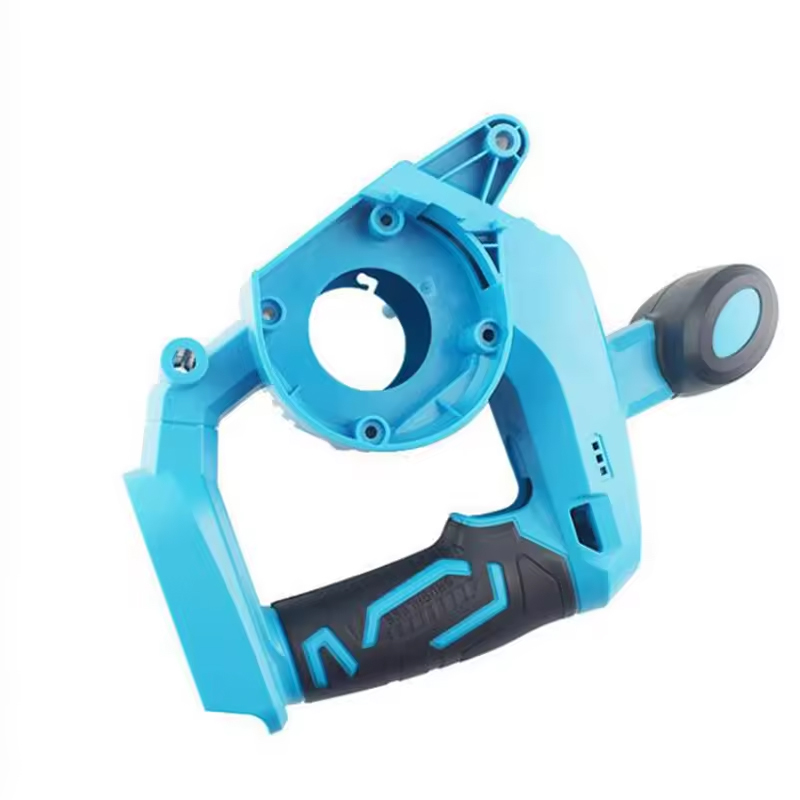
Hulrum og kerne: Danner den primære delgeometri
Rollen for hulrummet: Definerer delens ydre overflade
Hulrummet formgiver grundlæggende, hvordan den færdige plastdel ser ud på ydersiden, herunder de vigtige kosmetiske detaljer, som kunder lægger mærke til. Når varm plast presses ind i formen, kontrollerer dette nøje bearbejdede element overfladens glathed, sikrer formens nøjagtighed og fastholder konstante mål gennem hele produktionen. En god hulrumsdesign hjælper med at forhindre problemer som indtrængninger, hvor materialet trækker sig indad, krumning, når dele bøjer sig ud af form, og flæser, der skaber uønsket ekstra materiale langs kanterne. Det er afgørende, hvordan trykket fordeles jævnt, og hvordan varme håndteres. Valget af materialer handler om, hvad der kan modstå slid og stadig poleres godt. De fleste værksteder vælger i dag herdede værktøjsstål. Til almindelige produktionsløb fungerer P20-stål tilstrækkeligt godt. Men hvis der kræves noget mere robust til meget krævende forhold eller mange cyklusser, bliver H13 standardvalget. Nogle særlige tilfælde kræver i stedet rustfrit stål, især når der arbejdes med vanskelige harpiksarter som PVC eller sådanne, der indeholder halogenerede flammehæmmere, som måske kan korrodere almindeligt stål over tid.
Sådan former kerneformen den interne geometri
Kernen sidder modsat hulrummet og skaber alle de indre detaljer som huller, forstærkningsribber, armeringer og undercuts, som virkelig afgør, hvor godt en del fungerer og passer sammen under samling. Det er meget vigtigt at få justeret alignment mellem kerne og hulrum korrekt, da det forhindrer uønsket flash og sikrer ensartet vægtykkelse i emnet. Når man arbejder med komplekse designs, gør anvendelsen af modulære kerner vedligeholdelse nemmere og giver konstruktører mulighed for at justere deres idéer uden at skulle genopbygge hele formen fra bunden. Denne fleksibilitet giver producenterne et reelt forspring, når de arbejder med skræddersyede plastinjektionsprojekter, hvor ændringer ofte forekommer.
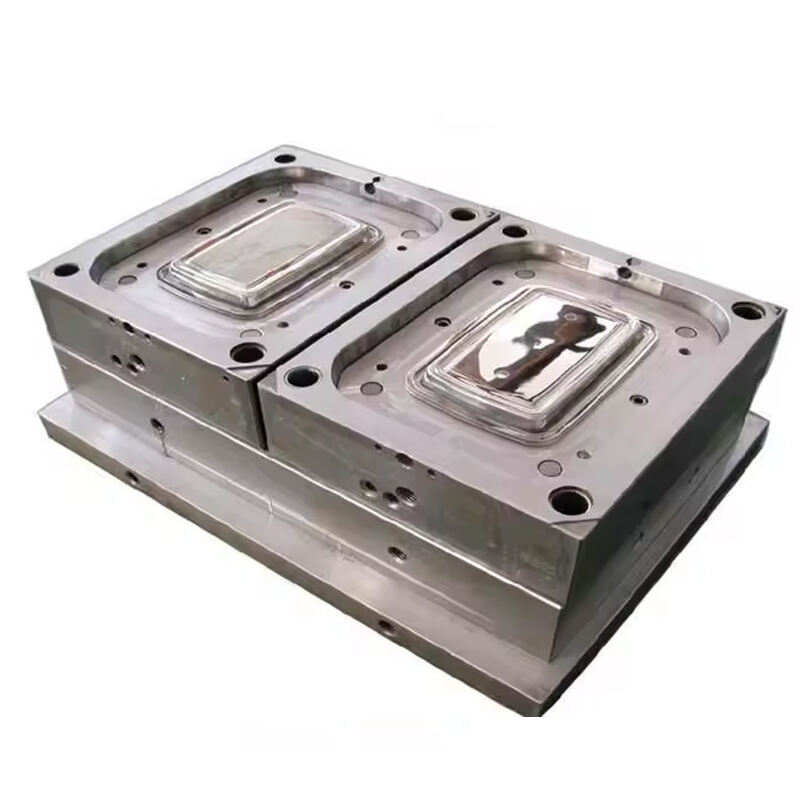
Valg af materiale og herding af hulrums- og kerneblokke
Værktøjsstål er stadig kongen, når det gælder fremstilling af formrum og kernekasser, fordi disse materialer netop rammer den rette balance mellem bearbejdningsbarheden, deres hårdhedsinterval på ca. 48 til 54 HRC og holdbarheden under varmepåvirkning. Når man skal vælge det rigtige stål, skal producenter overveje flere faktorer, som alle hænger sammen. Først og fremmest er der typen af polymer, der anvendes – nogle er meget slidende, mens andre angriber metallet kemisk. Derefter kigger man på, hvor mange emner der kan produceres, før formen er slidt. Tag for eksempel H13-stål, som kan klare over en halv million produktionscyklusser. Termiske egenskaber er også vigtige, da forskellige plastmaterialer kræver forskellige køleprocesser under produktionen. For at øge levetiden yderligere bliver overfladebehandlinger afgørende. Metoder som nitridering eller påførsel af et tyndt lag titaniumnitrid hjælper med at beskytte mod irriterende problemer som materiale, der fastnagler sig til formoverfladen, eller slidas fra f.eks. glasfibre i plasten.
Præcisions tolerancer i hulrums-kernejustering
Submikron-justering mellem hulrum og kerne er uomgængelig for højpræcisionsforme. En ujævnhed på over 0,005 mm medfører risiko for forkert samling ved delingslinje, varierende vægtykkelse og tidlig formeslitage. Branchens standardmetoder inkluderer:
| Justeringsmetode |
Tolerancemargen |
Anvendelseseksempel |
| Føringsstifte og -bushinger |
±0.01 mm |
Standardkomponenter |
| Indgrebende koniske låse |
±0.005 mm |
Komplekse geometrier |
| Termisk udvidelseskompensation |
±0,002 mm |
Højtemperaturmaterialer |
Disse systemer bevarer positionsnøjagtighed under termisk cyklus og mekanisk belastning – afgørende for gentagelig dimensionsnøjagtighed over lange produktionsløb.
Løber- og indløbssystemer: Styring af materialestrøm og indgang
Sprue, løber og indløb: Banen for smeltet plast
Løbesystemet, som omfatter støbemane, løbere og portsteder, fungerer grundlæggende som et motorvejsnet for smeltet plast, der skal ind i formhulen. Når løbere er fuld runde og har glatte koner, hjælper det med at skabe en bedre laminar strømning. Dette reducerer problemer forårsaget af skæreforcer og luft, der er fanget, hvilket kan føre til irriterende svejselinjer eller ufuldstændig fyldning, såkaldte short shots. God designarbejde på disse systemer eliminerer irriterende døde punkter, hvor plasten blot sidder og opvarmes for længe. Kortere opholdstid betyder mindre risiko for, at materialet nedbrydes over tid. Nogle producenter rapporterer affaldsreduktioner, der nærmer sig fuldstændig eliminering, når de sammenligner optimerede systemer med ældre designs, der ikke var ordentligt afbalancerede.
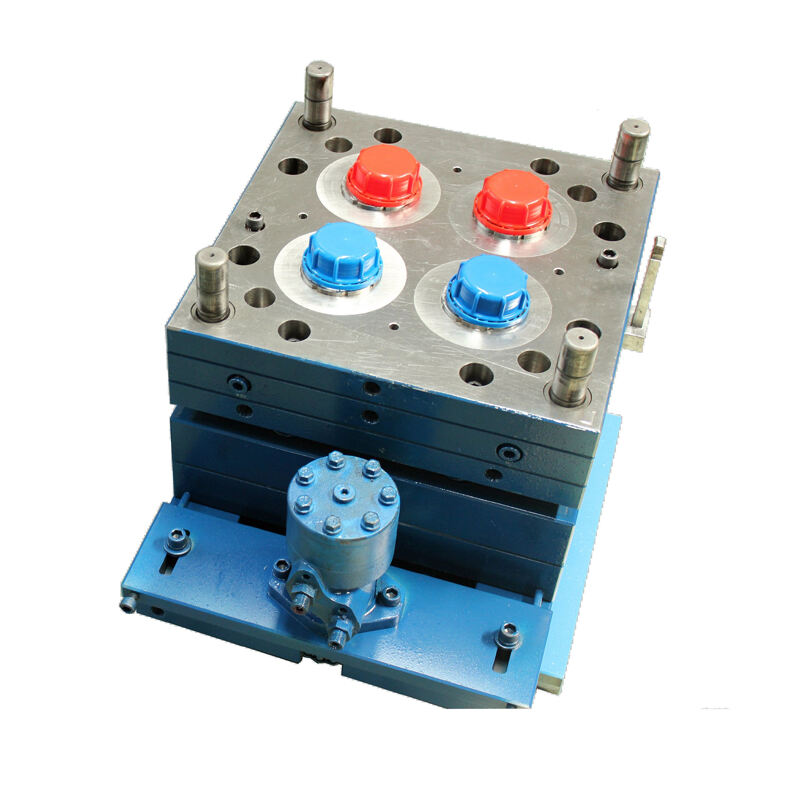
Kold- vs. varmløbesystemer: Effektivitet og affaldsreduktion
Hot runner-systemer holder plast smeltet via opvarmede fordelerrør og dyser, hvilket betyder, at der ikke er noget fastløbent løbermateriale tilbage at håndtere. Disse systemer reducerer cyklustiden med omkring 12 til måske 30 procent, fordi de undgår afkølingstrinnet, som er nødvendigt ved almindelige kolde løbere. Det gør hot runner-systemer til fremragende valg, når der produceres store mængder eller arbejdes med specialiserede tekniske plastmaterialer, der reagerer dårligt på temperaturændringer over tid. Omvendt er kolde løbere meget enklere i opbygningen og billigere i starten, men de producerer omkring 15 til 40 procent affald efter hver formningscyklus og tager samlet set længere tid. Alligevel vælger mange producenter at bruge kolde løbere til hurtig prototyping eller små serier, hvor det økonomisk ikke giver mening at investere stort i specialiseret værktøjning.
| Systemtype |
Affaldsproduktion |
Indvirkning af cyklustiden |
Bedste anvendelsestilfælde |
| Kold Løber |
15-40% af skudvægt |
+20-50% afkølingstrin |
Prototyper, små serier |
| Varløber |
≤5% materialeforbrug |
Optimeret ved eliminering af afkøling |
Høj produktion, tekniske harpiks |
Typer af formporte: Pind, kant, under- og vifteporte
Valget af porttype gør stor forskel for, hvor godt det endelige emne ser ud, fungerer og holder over tid. Lad os bryde det ned lidt. Nåleporte fungerer fremragende, når der arbejdes med små komponenter, der kræver præcision. Kantporte er ret pålidelige til at sikre korrekt materialestrøm langs kanterne af emner og gør afskæring meget nemmere efter produktionen. Undervandsporte har den smarte egenskab, at de i bund og grund skærer sig selv over under udkastningen, så der næsten ikke er noget mærke tilbage på den vigtige overflade. Vifteporte fordeler materialet pænt over de vanskelige tynde vægge, men efterlader nogle gange lidt rengøringsarbejde. Og her er noget vigtigt, som producenter altid tager højde for: Hvert portdesign skal holde sig inden for visse grænser, afhængigt af hvilken type plast, der anvendes. Pres for hårdt med materialer som polycarbonat eller PEEK, og pas på problemer som farvændringer eller faktisk kemisk skade på polymerstrukturen selv.
Portplacering og æstetiske-konstruktive afvejninger
At få portplaceringen rigtig betyder at finde et optimalt sted mellem strukturel styrke og hvordan emnet ser ud. Strukturelle porte placeres der, hvor de kan føde disse tykkere områder for at forhindre synkehuller og sikre, at alt fyldes jævnt. Kosmetiske porte anbringes i steder, som ingen vil se, f.eks. under overflader, omkring monteringspunkter eller skjult bag andre funktioner, uden at forringe materialestrømmen. Tallene understøtter også dette. Ifølge ASM International skyldes omkring 68 % af overfladefejl forkerte valg af portplacering. Derfor vender mange producenter sig nu mod avancerede 3D-strømningsimulationer. Disse værktøjer opdager problemer i et tidligt stadie og viser potentielle sømflader, spændingspunkter og krympningsproblemer lang før nogen går i gang med at fremstille formværktøjer til produktion.
Minimering af portrest i brugerdefineret plastformning
For at minimere de irriterende skrammer der ødelægger udseendet af de støbte dele, må fabrikanterne kombinere intelligente processer med et godt værktøj. Ved at holde temperaturen stabil omkring dørområdet, ideelt set inden for 2 grader Celsius, undgås problemer som tidlig stivning eller overdreven skæringskraft. Hvis man ændrer form på porte til noget mere konisk eller konisk, er det lettere at fjerne dem efter støbning. Og større porte fungerer generelt også bedre, så længe de holder sig inden for de sikre skæregrænser, for det reducerer stressblegningsproblemerne når man arbejder med visse følsomme materialer. For dele hvor udseendet er vigtigst, kan et ekstra polerings trin få de resterende mærker til at være mindre end 0,05 millimeter dybe, hvilket er praktisk talt usynligt for det blotte øje. Dette detaljeringsniveau er afgørende for produkter, der ender i forbrugernes hænder. Laser teknologi har også gjort en stor forskel her, ved at reducere manuelt færdiggøringsarbejde med omkring halvdelen i mange tilfælde, især værdifuldt når man beskæftiger sig med små porte på præcisionskomponenter hvor traditionelle metoder bare ikke skærer det.
Køling og udskjulning: Optimering af cyklustid og emnefrigivelse
Designprincipper for kølekanaler i plastinjektionsforme
Kølekanalernes opstilling giver formentlig den største forskel, når man forsøger at reducere cyklustider og forbedre komponentkvaliteten. God praksis indebærer, at disse kanaler føres tæt på selve komponentens form, især omkring de tykkere områder, men samtidig være forsigtig med ikke at skabe problemer med udkastningsnåle, skydemekanismer eller andre vigtige dele af formens struktur. Når varme fjernes jævnt over formen, hjælper det med at forhindre uregelmæssig krympning og forvrængning, som kan ødelægge færdige produkter. Nogle producenter skifter til koblerbaserede materialer i stedet for almindelig værktøjsstål, fordi de leder varme bedre. Disse koblerlegeringer, som Glidcop eller AMPCO, kan faktisk overføre varme cirka 40 % hurtigere end standardmulighederne. Dette gør en reel forskel for visse udfordrende plasttyper såsom PPS eller flydende krystallerpolymere, som kræver præcis temperaturkontrol under produktionen.
Konform køling ved anvendelse af additiv produktion
Med metal 3D-printing følger muligheden for at skabe formfølgende kølekanaler, der følger den faktiske form af emnet i stedet for blot at bore lige huller. Det betyder, at der ikke længere opstår varmepunkter under produktionen, og køletiderne falder mellem 25 % og op til omkring 70 % i forhold til traditionelle metoder. Den måde, disse kanaler er designet på, hjælper faktisk med at opretholde bedre dimensionsnøjagtighed og glattere overflader, især tydeligt, når der arbejdes med dele, der har uregelmæssige former eller komplekse geometrier. Selvfølgelig er den oprindelige investering stadig ret høj for små serier, men forholdene ændrer sig ret hurtigt, når producenter går over til større serier, hvor præcision er afgørende. Når hvert sekund tæller, og hvert korrekt emne tæller med til bundlinjen, begynder besparelserne virkelig at mærkes over tid.
Dataindsigt: Køling udgør 60 % af cyklustiden
Termisk afkøling dominerer injektionsformningscyklussen – og udgør cirka 60 % af den samlede tid. Da fastfrysning følger velkendte fysiske love (styret af deltykkelse og termisk diffusivitet), kan afkølingen ikke fremskyndes ud over materialegrænserne. Det gør intelligent kanaludformning – ikke hurtigere maskiner – til den mest effektive faktor for optimering af cyklustiden.
Udstødningsnåle, sleeves og stripperes funktion
At få udkastningssystemer til at virke korrekt betyder, at der anvendes præcis den rette mængde kraft til at skubbe dele ud uden at efterlade mærker eller forårsage skader. Udkastningsnåle fungerer bedst, når de retter sig mod områder, hvor udseendet ikke er så afgørende. Til de vanskelige steder inde i forme hjælper specielle sleeves med at beskytte sårbare kerneafsnit, samtidig med at de tillader, at dele med lange, smalle kanaler frigøres rent. Udløserplader er en anden vigtig komponent, især til ting som tynde plastplader eller store flade komponenter, som kræver forsigtig håndtering under fjernelse. Når disse dele arbejder sammen i rækkefølge, typisk tidsmæssigt koordineret med, hvordan formen åbner, forhindres dannelse af luftlommer og sikres, at alt kommer ud lige og uden forvrængning. Korrekt sekvensering gør hele forskellen mellem en fejlfri produktionsrunde og problemer med fastsiddende dele, der kræver ekstra arbejde at rette op på.
Forhindre skader under udkastning ved korrekt hældning
At få udkastevinklerne rigtige mellem 0,5 og 3 grader gør alverden, når dele skal løsnes rent fra forme. Uden korrekt udkast på lodrette flader kan udskydningskræfterne stige med op til tre gange, hvilket medfører reelle problemer senere, såsom overfladeskader, revner eller endda brudte kerne. Dette er især vigtigt ved vanskelige materialer, der enten slider meget eller trækker sig kraftigt sammen under afkøling, som f.eks. glasforstærket nylon eller visse typer polyethylen. For dem, der arbejder med skræddersyede plaststøbte komponenter, er udkast ikke noget, der tilføjes i sidste øjeblik. Gode ingeniører integrerer det direkte i de lodrette elementer fra dag ét. De kører også simuleringer for at tjekke, hvordan alt fungerer sammen med udskudningssystemet samt med hensyn til, hvordan forskellige plastmaterialer opfører sig under afkøling og fastgøring.
Sidehandlinger, skyder og udfordringer ved formbarhed
Hvornår man skal bruge skyder i stedet for direkte trækkerner
Slides er afgørende, når delegeometri omfatter funktioner vinkelret på formåbningens retning – sidehuller, klemmer, snap-fittings eller laterale undercuts – som ikke kan opnås med lige kernekerner. De bevæger sig lateralt før formåbning, danner funktionen og trækker sig derefter tilbage for at tillade udskubning af emnet. Slides anvendes, når:
- Der findes funktioner i flere retninger på én enkelt del
- Udhældning ikke kan løse geometrien (f.eks. ægte 90° undercuts)
- Produktionsvolumen berettiger den øgede værktøjskompleksitet og -vedligeholdelse
Gibbs, Hæle og Hornbolte: Understøtning af Sidehandlinger
Tre kernekomponenter sikrer slidens pålidelighed og levetid:
-
Gibbs : Hærdeforstærkede stålføringsplader, der sikrer justering og modstår slitage
-
Hæle : Låseblokke konstrueret til at modstå indsprøjtningstryk op til 15.000 PSI
-
Hornnåle : Vinklede aktuatorer, der omdanner vertikal formbevægelse til præcis horisontal skovelbevægelse
Når de er korrekt hårdnet (48–52 HRC) og smurt, kan disse komponenter klare over 500.000 cyklusser, mens de bibeholder gentagne præcision på mikronniveau.
Analyse af kontrovers: Skovlens pålidelighed versus formens kompleksitet
Slides giver designere mere frihed, men de introducerer også potentielle problemstillinger. Ifølge branchetal skyldes omkring 35 procent af uventet værktøjsnedetid problemer med slides, såsom at de sidder fast, sliddes eller mister alignment. Nogle designere foreslår at gøre dele enklere, så de slet ikke behøver slides. De henviser til studier, hvor en reduktion af værktøjskompleksitet med cirka 20 % resulterede i omkring 42 % færre fejl. Men når det gælder særlig præcise produkter som medicinsk udstyr, kameralinser eller flydele, kan slides ikke erstattes. Det vigtigste er ikke at undgå dem fuldstændigt, men at sikre, at de er korrekt konstrueret fra starten ved hjælp af robuste materialer og ved at foretage regelmæssig kontrol og vedligeholdelse gennem hele deres levetid.
Ventilation og skråfald: Vigtige for kvalitet og udformning
Mikroventilation for at forhindre brændmærker og luftlommer
Mikroventiler er dybest set små kanaler, typisk mellem 0,015 og 0,025 mm dybe, placeret langs skilnelinjer, tæt på kerneområder eller ved siden af udskydningsnåle. Disse små funktioner hjælper med at fjerne indespærret luft, når formhulen fyldes. Når disse ventiler mangler, bliver den komprimerede luft ekstremt varm, nogle gange over 400 grader Celsius, hvilket forårsager forbrænding af hærdeplastmaterialet. Dette resulterer i utiltalende forbrændingsmærker, tomme rum indeni dele eller områder, hvor materialet ikke er fyldt korrekt. Det er også meget vigtigt at placere ventilerne rigtigt, da det forhindrer dannelsen af irriterende gaslommer. Disse gaslommer kan svække delens strukturelle integritet og ødelægge overfladeudseendet. For tyndvæggede dele, der kræver stramme tolerancer, er dette endnu vigtigere, da eventuelle fejl bliver meget mere synlige og problematiske.
Skøjtning og deres rolle for problemfri udformning
Vinklerne på dele, typisk omkring 1 til 3 grader, men nogle gange op til 5 grader for materialer som polyethylen eller polypropylen, som krymper ret meget, hjælper med at skråstille de lodrette sider, så der opstår mindre friktion, når delen skubbes ud af formen. Når disse uddragningsvinkler ikke er tilstrækkelige, kræver maskinen fire gange så stor kraft til at ejecte delen, og produktionscykluserne tager 15 % til 25 % længere tid. Desuden slides formerne hurtigere ned, og delene beskadiges oftere. Mange tænker på uddragning udelukkende som noget, der hjælper med frigørelse af dele, men det er faktisk en af de grundlæggende byggesten i god formdesign, som bør overvejes allerede i starten af enhver produktudviklingsproces.
Industrimodsigelse: Underdimensioneret ventilation i højpræcisionsforme
Ventilation overses ofte, selv i præcisionsforme, fordi folk er bange for, at det vil gøre tingene mere komplicerede eller ødelægge overfladeudseendet. Men her er kernen: luft, der bliver fanget, forårsager omkring en tredjedel af alle kosmetiske problemer, og nedbryder gradvist stålet, hvilket betyder hyppigere reparationer og højere omkostninger på sigt. Når man arbejder med brugerdefinerede plastdele, der kræver tolerancer under 0,1 millimeter, er korrekt ventilation ikke længere noget, der blot er rart at have. Det bliver absolut nødvendigt for at holde hele processen kørende problemfrit, sikre, at delene bliver produceret korrekt, og forlænge levetiden for dyre forme.
Ofte stillede spørgsmål
Hvilke materialer anvendes typisk til formhulrum og kernekasser i forme?
Afhærdnede værktøjsstål som P20 og H13 anvendes ofte til formhulrum og kerne på grund af deres holdbarhed og evne til at modstå varme. Rustfrit stål bruges, når der arbejdes med ætsende harper.
Hvad er forskellene mellem kolde og varme forgreningssystemer?
Kolde løpersystemer er enklere og billigere, men producerer mere affald. Varme løpersystemer reducerer cyklustider og affald, men er dyrere i starten.
Hvordan forbedrer konforme kølekanaler injektionsstøbeprocessen?
Konforme kølekanaler forbedrer køleeffekten ved at følge emnets form, hvilket reducerer varme punkter og cyklustider.
Hvad er de største udfordringer ved brug af skyder i skabelondesign?
Skydere tilføjer kompleksitet og potentielle pålidelighedsproblemer på grund af justering og slid, men de er afgørende for dele med komplekse geometrier.
 EN
EN
 AR
AR
 HR
HR
 CS
CS
 DA
DA
 NL
NL
 FI
FI
 FR
FR
 DE
DE
 EL
EL
 IT
IT
 JA
JA
 KO
KO
 NO
NO
 PL
PL
 PT
PT
 RO
RO
 RU
RU
 ES
ES
 SV
SV
 TL
TL
 ID
ID
 LT
LT
 SK
SK
 SL
SL
 VI
VI
 TH
TH
 TR
TR
 AF
AF
 MS
MS
 GA
GA
 BN
BN
 HMN
HMN
 LO
LO
 LA
LA
 MI
MI
 MN
MN
 NE
NE
 MY
MY
 UZ
UZ

 Seneste nyheder